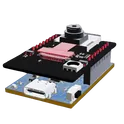
ESP32 Schematics
The ESP32 is a low-cost, low-power microcontroller with built-in Wi-Fi and Bluetooth capabilities. It is a highly integrated chip designed for the Internet of Things (IoT) and can be used for a variety of applications, including home automation, wearable technology, and industrial control. One of the key features of the ESP32 is its versatility and wide range of available peripherals, including sensors, displays, and communication modules. This makes it ideal for use in a variety of projects and applications, such as home security systems, smart home devices, and industrial automation systems. Flux.ai has the world's largest community-driven public library of ESP32 devices, with a range of footprints, symbols, datasheets, and simulation models available for users. This extensive library allows developers and designers to easily incorporate the ESP32 into their projects and take advantage of its powerful capabilities. Whether you are building a simple IoT device or a complex industrial control system, the ESP32 is an excellent choice due to its versatility and wide range of available resources.
ESPRSSO32 Smart Scale AI Auto Layout [Example]
Learn how to use AI Auto Layout on this ESP32 Espresso Smart Scale! In one click you’ll see AI Auto Layout perform magic. Pay close attention to how we recommend creating rulesets, zones, and fanouts. By copying the setup in this example on your own project, you’ll have a fully routed board in no time!
0 Uses0 StarsESPRSSO32 Smart Scale AI Auto Layout [Example]
Learn how to use AI Auto Layout on this ESP32 Espresso Smart Scale! In one click you’ll see AI Auto Layout perform magic. Pay close attention to how we recommend creating rulesets, zones, and fanouts. By copying the setup in this example on your own project, you’ll have a fully routed board in no time!
0 Uses0 StarsESPRSSO32 Smart Scale AI Auto Layout [Example]
Learn how to use AI Auto Layout on this ESP32 Espresso Smart Scale! In one click you’ll see AI Auto Layout perform magic. Pay close attention to how we recommend creating rulesets, zones, and fanouts. By copying the setup in this example on your own project, you’ll have a fully routed board in no time!
0 Uses0 StarsESPRSSO32 Smart Scale AI Auto Layout [Example] xjg2
Learn how to use AI Auto Layout on this ESP32 Espresso Smart Scale! In one click you’ll see AI Auto Layout perform magic. Pay close attention to how we recommend creating rulesets, zones, and fanouts. By copying the setup in this example on your own project, you’ll have a fully routed board in no time!
0 Uses0 StarsESPRSSO32 Smart Scale AI Auto Layout [Example]
Learn how to use AI Auto Layout on this ESP32 Espresso Smart Scale! In one click you’ll see AI Auto Layout perform magic. Pay close attention to how we recommend creating rulesets, zones, and fanouts. By copying the setup in this example on your own project, you’ll have a fully routed board in no time!
0 Uses0 StarsESP32 Robot Controller | AI Design Review Tutorial [Example]
Spot the mistake! Learn how to use AI to conduct a design review on an ESP32-based control board. This project is ideal for autonomous or radio-controller robots featuring inputs for sensors, encoders, and a Flysky RC receiver, plus an I2C display for configuration.
0 Uses0 StarsESP32 Robot Controller | AI Design Review Tutorial [Example]
Spot the mistake! Learn how to use AI to conduct a design review on an ESP32-based control board. This project is ideal for autonomous or radio-controller robots featuring inputs for sensors, encoders, and a Flysky RC receiver, plus an I2C display for configuration.
0 Uses0 StarsESPRSSO32 Smart Scale AI Auto Layout [Example]
Learn how to use AI Auto Layout on this ESP32 Espresso Smart Scale! In one click you’ll see AI Auto Layout perform magic. Pay close attention to how we recommend creating rulesets, zones, and fanouts. By copying the setup in this example on your own project, you’ll have a fully routed board in no time!
0 Uses0 StarsESP-CAM Motherboard Module 269c
This project is a motherboard for the ESP32-CAM module, which enables easy and flexible WiFi camera applications. The motherboard provides power supply, programming interface, and GPIO expansion for the ESP32-CAM. It also supports external sensors for more functionality. #motherboard #WiFi #MCU #ReferenceDesign #project #ESP32 #camera #reusable #module #edgeComputing #espressif #template
0 Uses0 StarsESPRSSO32 Smart Scale AI Auto Layout [Example]
Learn how to use AI Auto Layout on this ESP32 Espresso Smart Scale! In one click you’ll see AI Auto Layout perform magic. Pay close attention to how we recommend creating rulesets, zones, and fanouts. By copying the setup in this example on your own project, you’ll have a fully routed board in no time!
0 Uses0 StarsESPRSSO32 Smart Scale AI Auto Layout [Example]
Learn how to use AI Auto Layout on this ESP32 Espresso Smart Scale! In one click you’ll see AI Auto Layout perform magic. Pay close attention to how we recommend creating rulesets, zones, and fanouts. By copying the setup in this example on your own project, you’ll have a fully routed board in no time!
0 Uses0 StarsESPRSSO32 Smart Scale AI Auto Layout [Example]
Learn how to use AI Auto Layout on this ESP32 Espresso Smart Scale! In one click you’ll see AI Auto Layout perform magic. Pay close attention to how we recommend creating rulesets, zones, and fanouts. By copying the setup in this example on your own project, you’ll have a fully routed board in no time!
0 Uses0 StarsESPRSSO32 Smart Scale AI Auto Layout [Example] pDwq
Learn how to use AI Auto Layout on this ESP32 Espresso Smart Scale! In one click you’ll see AI Auto Layout perform magic. Pay close attention to how we recommend creating rulesets, zones, and fanouts. By copying the setup in this example on your own project, you’ll have a fully routed board in no time!
0 Uses0 StarsESPRSSO32 Smart Scale AI Auto Layout [Example]
Learn how to use AI Auto Layout on this ESP32 Espresso Smart Scale! In one click you’ll see AI Auto Layout perform magic. Pay close attention to how we recommend creating rulesets, zones, and fanouts. By copying the setup in this example on your own project, you’ll have a fully routed board in no time!
0 Uses0 StarsESPRSSO32 Smart Scale AI Auto Layout [Example]
Learn how to use AI Auto Layout on this ESP32 Espresso Smart Scale! In one click you’ll see AI Auto Layout perform magic. Pay close attention to how we recommend creating rulesets, zones, and fanouts. By copying the setup in this example on your own project, you’ll have a fully routed board in no time!
0 Uses0 StarsSupporting Crimson Battle Mech
Entrada de Corriente y Fusible Qué hace: Es el punto de partida. La electricidad de 120V entra a tu prototipo. El fusible es el guardián de seguridad principal. Dónde se conecta: El Cable de Alimentación se conecta al enchufe de la pared. Dentro de la caja, el cable VIVO (el que lleva la potencia, usualmente negro o rojo) se conecta a una patita del Portafusible. Dónde termina: La otra patita del Portafusible es ahora la salida segura del cable VIVO. 2. Fuente de Poder (HLK-PM01) Qué hace: Es el "transformador" que alimenta al cerebro. Convierte los peligrosos 120V en 5V seguros. Dónde se conecta: Sus dos pines de entrada (AC) se conectan a los cables VIVO (justo después del fusible) y NEUTRO de la entrada de corriente. Dónde termina: Sus dos pines de salida (DC) entregan 5V. El pin +5V se conecta al pin VIN del ESP32. El pin GND (tierra) se conecta a un pin GND del ESP32. 3. Sensor de Voltaje (ZMPT101B) Qué hace: "Observa" el voltaje de la línea de 120V de forma segura. Dónde se conecta: Sus dos pines de entrada (AC) se conectan igual que la fuente de poder: al VIVO (después del fusible) y al NEUTRO. Dónde termina: Su pin de salida de señal (Aout o Signal) se conecta a un pin analógico del ESP32 (por ejemplo, GPIO35). También necesita alimentación, así que sus pines VCC y GND se conectan a los pines 3.3V y GND del ESP32. 4. Sensor de Corriente (WCS1600) Qué hace: "Siente" cuánta corriente (amperios) está pasando hacia la licuadora. Dónde se conecta: El cable VIVO de 120V (el que viene del fusible) pasa a través del agujero blanco del sensor. No se conecta eléctricamente, solo pasa por en medio. Dónde termina: La placa del sensor tiene 3 pines de control: VCC se conecta al pin 3.3V del ESP32. GND se conecta a un pin GND del ESP32. Aout (salida analógica) se conecta a otro pin analógico del ESP32 (por ejemplo, GPIO34). 5. Relé de Estado Sólido (SSR-25 DA) Qué hace: Es el interruptor inteligente. Actúa como una compuerta que abre o cierra el paso de la electricidad a la licuadora. Dónde se conecta: Lado de Potencia (AC): El cable VIVO (que ya pasó por el sensor de corriente) se conecta a uno de los terminales de alta potencia del SSR. Lado de Control (DC): El pin de control DC+ del SSR se conecta a un pin digital del ESP32 (por ejemplo, GPIO23). El pin DC- se conecta a un pin GND del ESP32. Dónde termina: El otro terminal de alta potencia del SSR se conecta al terminal "vivo" del tomacorriente final. 6. Tomacorriente de Salida (a la Licuadora) Qué hace: Es el enchufe final donde conectas tu aparato. Dónde se conecta: Su terminal VIVO recibe el cable que viene de la salida del SSR. Su terminal NEUTRO recibe el cable NEUTRO directamente desde la entrada de corriente principal. Dónde termina: ¡Aquí termina el viaje! La licuadora recibe la electricidad controlada y medida por tu prototipo.
0 Uses0 StarsESPRSSO32 Smart Scale AI Auto Layout [Example]
Learn how to use AI Auto Layout on this ESP32 Espresso Smart Scale! In one click you’ll see AI Auto Layout perform magic. Pay close attention to how we recommend creating rulesets, zones, and fanouts. By copying the setup in this example on your own project, you’ll have a fully routed board in no time!
0 Uses0 StarsESPRSSO32 Smart Scale AI Auto Layout [Example]
Learn how to use AI Auto Layout on this ESP32 Espresso Smart Scale! In one click you’ll see AI Auto Layout perform magic. Pay close attention to how we recommend creating rulesets, zones, and fanouts. By copying the setup in this example on your own project, you’ll have a fully routed board in no time!
0 Uses0 StarsESPRSSO32 Smart Scale AI Auto Layout [Example]
Learn how to use AI Auto Layout on this ESP32 Espresso Smart Scale! In one click you’ll see AI Auto Layout perform magic. Pay close attention to how we recommend creating rulesets, zones, and fanouts. By copying the setup in this example on your own project, you’ll have a fully routed board in no time!
0 Uses0 StarsESPRSSO32 Smart Scale AI Auto Layout [Example]
Learn how to use AI Auto Layout on this ESP32 Espresso Smart Scale! In one click you’ll see AI Auto Layout perform magic. Pay close attention to how we recommend creating rulesets, zones, and fanouts. By copying the setup in this example on your own project, you’ll have a fully routed board in no time!
0 Uses0 StarsESP32 Robot Controller | AI Design Review Tutorial [Example]
Spot the mistake! Learn how to use AI to conduct a design review on an ESP32-based control board. This project is ideal for autonomous or radio-controller robots featuring inputs for sensors, encoders, and a Flysky RC receiver, plus an I2C display for configuration.
0 Uses0 StarsESPRSSO32 Smart Scale AI Auto Layout [Example]
Learn how to use AI Auto Layout on this ESP32 Espresso Smart Scale! In one click you’ll see AI Auto Layout perform magic. Pay close attention to how we recommend creating rulesets, zones, and fanouts. By copying the setup in this example on your own project, you’ll have a fully routed board in no time!
0 Uses0 StarsESPRSSO32 Smart Scale AI Auto Layout [Example]
Learn how to use AI Auto Layout on this ESP32 Espresso Smart Scale! In one click you’ll see AI Auto Layout perform magic. Pay close attention to how we recommend creating rulesets, zones, and fanouts. By copying the setup in this example on your own project, you’ll have a fully routed board in no time!
0 Uses0 StarsESPRSSO32 Smart Scale AI Auto Layout [Example] 8Rgc
Learn how to use AI Auto Layout on this ESP32 Espresso Smart Scale! In one click you’ll see AI Auto Layout perform magic. Pay close attention to how we recommend creating rulesets, zones, and fanouts. By copying the setup in this example on your own project, you’ll have a fully routed board in no time!
0 Uses0 StarsESPRSSO32 Smart Scale AI Auto Layout [Example]
Learn how to use AI Auto Layout on this ESP32 Espresso Smart Scale! In one click you’ll see AI Auto Layout perform magic. Pay close attention to how we recommend creating rulesets, zones, and fanouts. By copying the setup in this example on your own project, you’ll have a fully routed board in no time!
0 Uses0 Stars
![ESPRSSO32 Smart Scale AI Auto Layout [Example]](https://img-cdn.flux.ai/eyJidWNrZXQiOiJncmF2aXRvbi1lbGVjdHJpYy1zeW1ib2xzIiwia2V5IjoiZG9jdW1lbnRfYXNzZXRzL0VTUFJFU1NPMzJfU21hcnRfU2NhbGVfM0RfVGh1bW5haWwtY2QxNTI2NjItNjdjMi00MTk4LWJmNjUtNDJiZDk5N2E0ODYyLnBuZyIsImVkaXRzIjp7InJlc2l6ZSI6eyJ3aWR0aCI6MTI0LCJoZWlnaHQiOjEyNCwiZml0IjoiY29udGFpbiIsImJhY2tncm91bmQiOnsiciI6MCwiZyI6MCwiYiI6MCwiYWxwaGEiOjB9fX0sIm91dHB1dEZvcm1hdCI6IndlYnAifQ==)
![ESP32 Robot Controller | AI Design Review Tutorial [Example]](https://img-cdn.flux.ai/eyJidWNrZXQiOiJncmF2aXRvbi1lbGVjdHJpYy1zeW1ib2xzIiwia2V5IjoiZG9jdW1lbnRfYXNzZXRzL1RodW1ibmFpbC1FU1AzMi0tMS0tZTNjNjM0OGEtYjEzMy00YjliLWEyYTItMzY1MGNiMjgyYWJiLnBuZyIsImVkaXRzIjp7InJlc2l6ZSI6eyJ3aWR0aCI6MTI0LCJoZWlnaHQiOjEyNCwiZml0IjoiY29udGFpbiIsImJhY2tncm91bmQiOnsiciI6MCwiZyI6MCwiYiI6MCwiYWxwaGEiOjB9fX0sIm91dHB1dEZvcm1hdCI6IndlYnAifQ==)